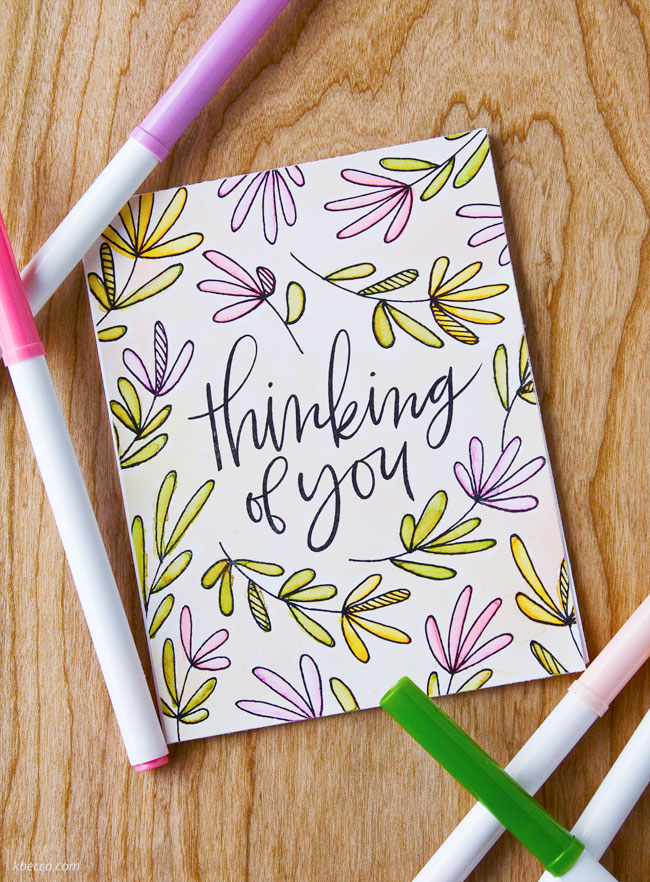
Can you watercolor with Crayola Super Tips Markers? Yes, you can, and in this week’s video I’ll show you how I made this whimsical floral card using the Crayola markers and one of the bonus printable A2 card front designs that is included in the Whimsy Leaves Digital Stamp set.
I’m really happy with how well the marker colors move when water is added. The result is softer than you’d get with many brands of regular watercolors, but you can always come back in and add layers of color for a bolder, more textured and dimensional look. I was going for a soft, more pastel look in this card, so I kept it to just one layer of color.
I was curious about whether the color would move as well after I left the marker to dry on the paper for several hours and am happy to report that it moved around just as easily when water was added after about 24 hours as it did when I added water immediately after coloring the marker onto the paper. I only tested this with Strathmore Bristol Vellum paper, so just a heads up that you may not get the same results if you use another brand of paper.
The Crayola Super Tips Markers are turning out to be a pretty versatile coloring medium! They may not give you the same results as higher end (read: much more expensive) watercolors or markers, but they’re a great choice if you’re looking for an inexpensive alternative for cardmaking and papercrafting.
Check out the video below to see a step-by-step tutorial for making this fun floral card:
Supplies Used in This Project
The following supply list contains affiliate links. I make a small commission if you purchase through these links, and I really appreciate it if you do!
AMZ = Amazon.com SBK = Scrapbook.com DKB = Dick Blick SSS = Simon Says Stamp
Whimsy Leaves Digital Stamps + Border Cuts (bonus printable card front)
Crayola 50 Count Washable Super Tips Markers
Strathmore Bristol Vellum Paper ( AMZ // DKB )
a laser printer
a #5 round paintbrush
double-sided tape
paper towels
a cup and water
For the “Hello” Card (shown in video)
All supplies used for this card are the same as for the “Thinking of You” card, but instead of Crayola markers I used Zig Clean Color Real Brush Pens. I outlined all of the elements with the Shadow Mauve and blended them out with a wet paintbrush. Then, I colored the leaves by blending Pale Green, Light Green, and Deep Green (I mixed up which colors I used from element to element) using just the brush pens, no water added.
Zig Clean Color Brush Pens (individual colors used):
045 // Pale Green
041 // Light Green
044 // Deep Green
303 // Shadow Mauve
Zig Clean Color Real Brush Pen Sets
Zig Clean Color Real Brush Pens, Set of 60
Zig Clean Color Real Brush Pens, Set of 48
Zig Clean Color Real Brush Pens, Set of 36
Zig Clean Color Real Brush Pens, Set of 24
Zig Clean Color Real Brush Pens, Set of 12
For the Hot Foil Cards (shown in video)
For these cards, I printed the “Best Wishes” and blank background designs onto Hammermill Color Copy paper, then foiled them using a Minc. The “Best Wishes” card was finished at this point, and I printed, foiled, and cut the “Hello” sentiment from the Whimsy Leaves set and added it to the patterned card front with foam adhesive squares to finish.
Heidi Swapp Minc Foil Applicator 12″ ( AMZ // SBK )
Heidi Swapp Minc Foil Applicator 6″ ( AMZ // SBK )
Therm O Web Deco Foil, Rose Gold
Therm O Web Deco Foil, Pewter
Hammermill Color Copy Digital Cover 80lb. Paper
3L Foam Adhesive Squares – “hello” card only
Silhouette Cameo ( AMZ // SBK ) – “hello” card only
a laser printer
