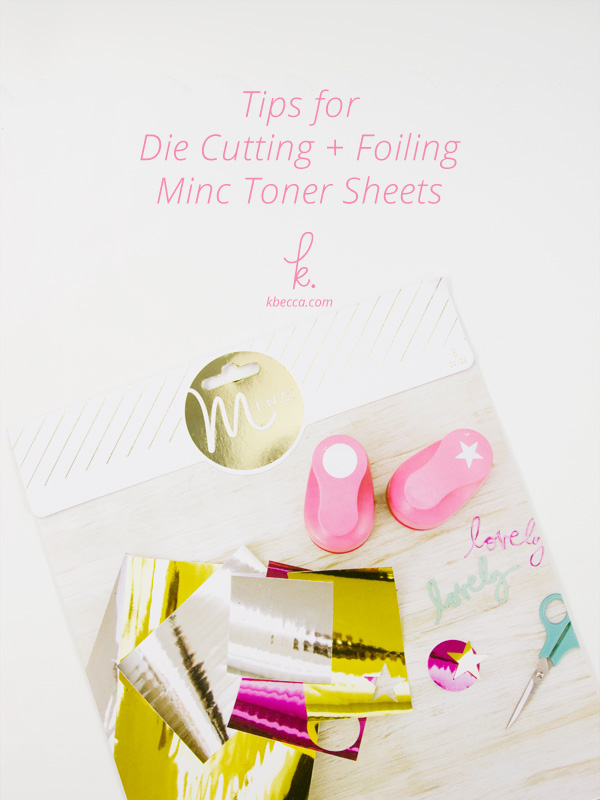
I’ve been playing around with the Minc Toner Sheets for a few weeks now, and I’ve gotta admit that I wasn’t getting great results there for a little while. Thankfully, I figured out that I’m a total dork (well, I already knew that) and was having many of the problems that I was having because I wasn’t doing things in the correct order. If I would’ve just taken a closer look at the package for the toner sheets, I would’ve been getting great results a lot sooner, so don’t do what I did! Look at that packaging.
Here’s what I figured out: to get great results, you have to foil the toner sheets BEFORE you cut them. As you can see below, when I cut the die cuts with my Silhouette Cameo first, my results weren’t fantastic.
There were areas around the edges of both the more complex, hand lettered die cut and the simple circle die cut that just didn’t take the foil. I think that part of this is due to some toner flaking off during the die cutting process. In addition, variations in the paper are created during the die cutting process mean that the paper isn’t perfectly level; it has bumps and indentations that create an uneven surface, and the foil doesn’t adhere in those places.
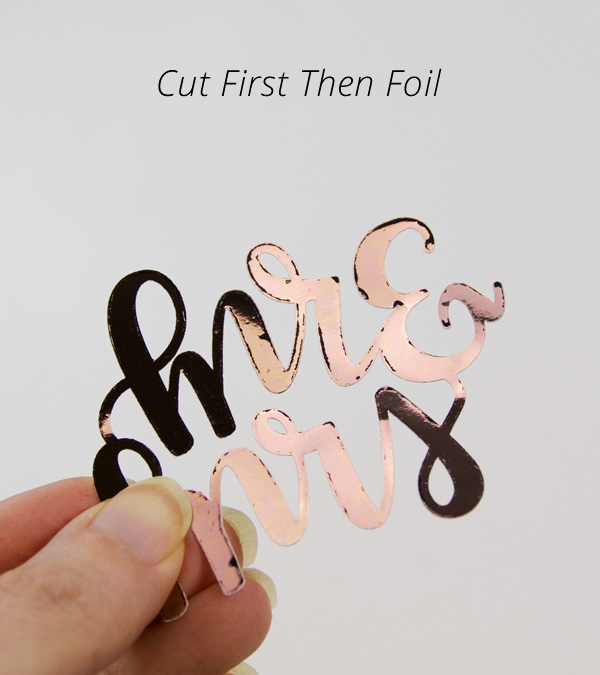
Above (Cut First Then Foil) : notice the areas around the edges of the letters, especially the “r” and the ampersand, where the foil did not adhere when I ran it through the Minc. This is what happens when you die cut before you foil. I used a digital die cutting machine to cut my shapes, so results may differ if you’re using a manual die cutting machine to cut your shapes.
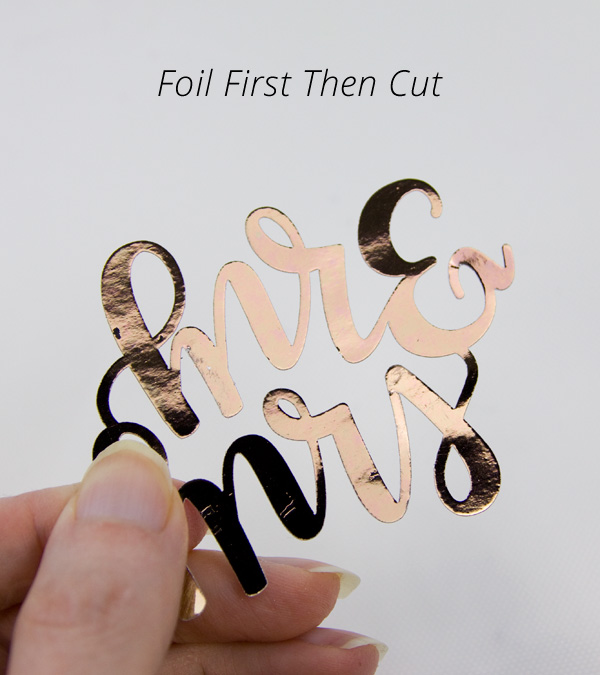
Above (Foil First Then Cut) : When I foiled the toner paper BEFORE I die cut it, my results were much, much better. You can see how much smoother the results are, practically a mirror finish, and none of the unfoiled lines around the outer edges of the letters. There are still slight imperfections, like the one in the top “m”, but most of them are hard to see in person. Also, I want to mention that I handled this toner sheet a lot before I foiled and cut it, and I’ve notice that sometimes that leads to more imperfections after foiling, probably because sitting the sheets on surfaces and handling them can cause slight bumps and indentations on the paper. So, I’d also recommend foiling the toner sheets straight out of the package if you can.
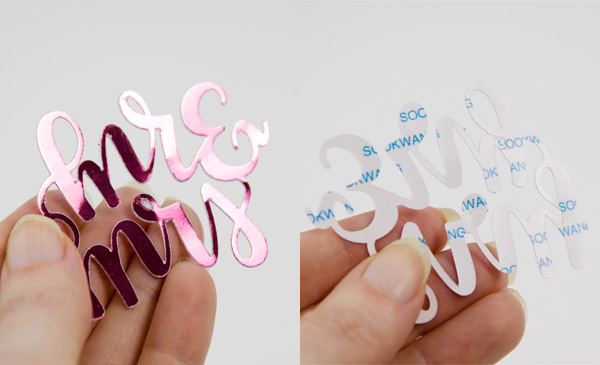
In the video below, you can also see how I created an adhesive backed, foiled die cut using Scor-Tape sheets. I’ve also had very nice results with the Silhouette Double-Sided Adhesive Sheets, but what I really like about the Scor-Tape is that the protective backer paper is kind of slick and waxy, and it didn’t stick to my Silhouette mat at all. I recommend using a Silhouette Light Hold mat either way because it releases the die cuts so much more easily than even a less sticky regular mat does when you’re using double-sided adhesive sheets. I use washi tape around the edges of the foiled paper to keep it on the mat while cutting. Here are the adhesive backed toner sheet results with the Scor-Tape:
Silhouette Cameo cut settings for Heidi Swapp Minc Toner Sheets (both unfoiled and foiled) : Depth = 6 // Speed = 2 // Thickness = 33 // Double Cut*
* You can probably get away with a single cut on the non-adhesive backed toner sheets if you have a sharper blade, but I double cut it just in case.
Silhouette Cameo cut settings for Heidi Swapp Minc Toner Sheets with Scor Tape or Silhouette Double-Sided Adhesive : Depth = 8 // Speed = 2 // Thickness = 33 // Triple Cut*
* double cut first, then immediately do another single cut before unloading the mat
Check out the video to see all of these tips in action:
Supplies Used in This Project
The following supply list contains affiliate links. I make a small commission if you purchase through these links, and I really appreciate it if you do!
AMZ = Amazon.com SBK = Scrapbook.com DKB = Dick Blick SSS = Simon Says Stamp
Mr & Mrs Hand Lettered Die Cut
Silhouette Cameo ( AMZ // SBK )
Heidi Swapp Minc 12″ ( AMZ // SBK ) – this is what I have
Heidi Swapp Minc 6″ ( AMZ / SBK )
Thermoweb iCraft Rose Gold Deco Foil ( AMZ / SBK )
Thermoweb iCraft Pink Melon Deco Foil ( AMZ / SBK )
Heidi Swapp Minc Toner Sheets ( (AMZ / SBK )
Scor-Tape 6″ Square Adhesive Sheets ( AMZ )
Silhouette Double-Sided Adhesive Sheets ( SBK // AMZ ) – not shown
Silhouette Cameo Light Hold Mat
washi tape
