Have you ever seen a product that instantly makes your heart skip a beat? Well, that’s what happened when I spotted Little B’s Gold Foil XO washi tape. When it arrived, it was super teeny and so neato, and I knew immediately that I had to use it to make some stripes on something. Anything!
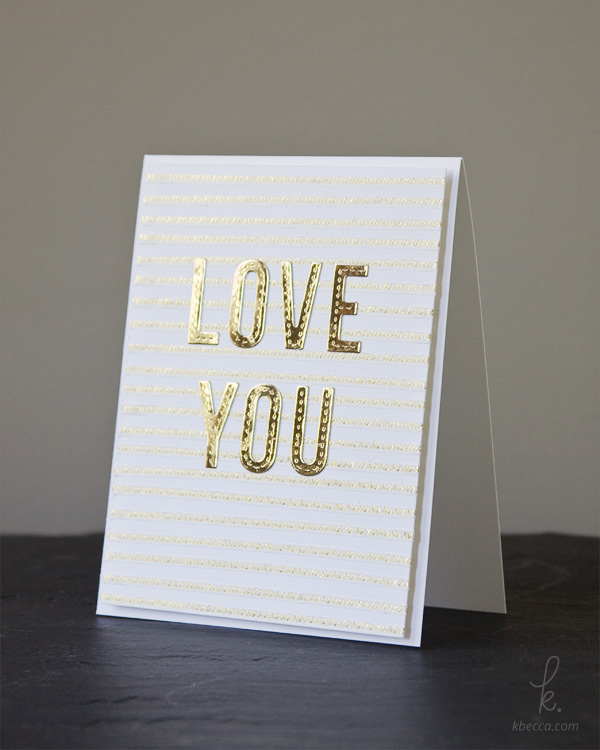
The result is this clean and simple card, which also features a “love you” sentiment die cut using the My Favorite Things Stitched Alphabet Die-Namics* and one of my current favorites, shiny gold foil cardstock.
I’ve already been scoping out some more of Little B’s 3mm washi tape designs because I just love how teeny tiny and sweet they are. I made a love-themed card here, but you could easily switch up the washi tape that you use and have a birthday, hello, or whatever other type of sentiment you’d like.
To make the card, I first cut a piece of white cardstock to 4 inches wide by 5.25” tall. Then, I lined up a t-square along the top left corner of the cardstock and used a pencil to make little dot markings on the cardstock at every quarter inch.
I tore lengths of washi tape that were about an inch or so longer than the cardstock on either side, and I lined each up at the top of one of the pencil markings and pulled the tape straight across the front of the cardstock to make a stripe.
After I was finished with the stripes, I pressed my fingers all over the front of the card to adhere any loose washi in place, and I folded the ends of the washi over the sides and onto the back of the cardstock. Then, I die cut letters spelling “love you” from gold foil cardstock and glued those to the front of the card, using the washi tape stripes as guides so I could easily line the letters up at the bottom.
Once all of the letters were glued in place, I cut a piece of fun foam to slightly smaller than the size of the cardstock and added strips of Scor-Tape to both sides, making sure to have the far left and far right strips less than an inch from the edge of the fun foam. Then, I pressed down any washi tape that had popped up on the back of the card, removed the backing paper from the strips of Scor-Tape on one side of the foam, and pressed the foam down onto the back of the cardstock, covering those loose ends of washi to permanently hold them in place.
To finish the card, I removed the backing paper from the Scor-Tape on the other side of the foam and mounted it onto a top fold A2 card base.
You can check out the video for this project below:
Supplies Used in This Project
The following supply list contains affiliate links. I make a small commission if you purchase through these links, and I really appreciate it if you do!
AMZ = Amazon.com SBK = Scrapbook.com DKB = Dick Blick SSS = Simon Says Stamp
white cardstock
Little B Gold Foil XO Tape
a pencil
a t-square or ruler
My Favorite Things Stitched Alphabet Die-namics ( SSS // MFT )
Tombow Mono Multi Liquid Glue
Gold Foil Card Stock ( MFT )
a manual die cutting machine
craft foam (also known as fun foam)
Scor-Tape (I used 5/8” inch, but you can use any size)
Fiskars Personal Paper Trimmer ( AMZ // SBK )
a sticky tool, like the Quick Stik or Pick Me Up (optional)
