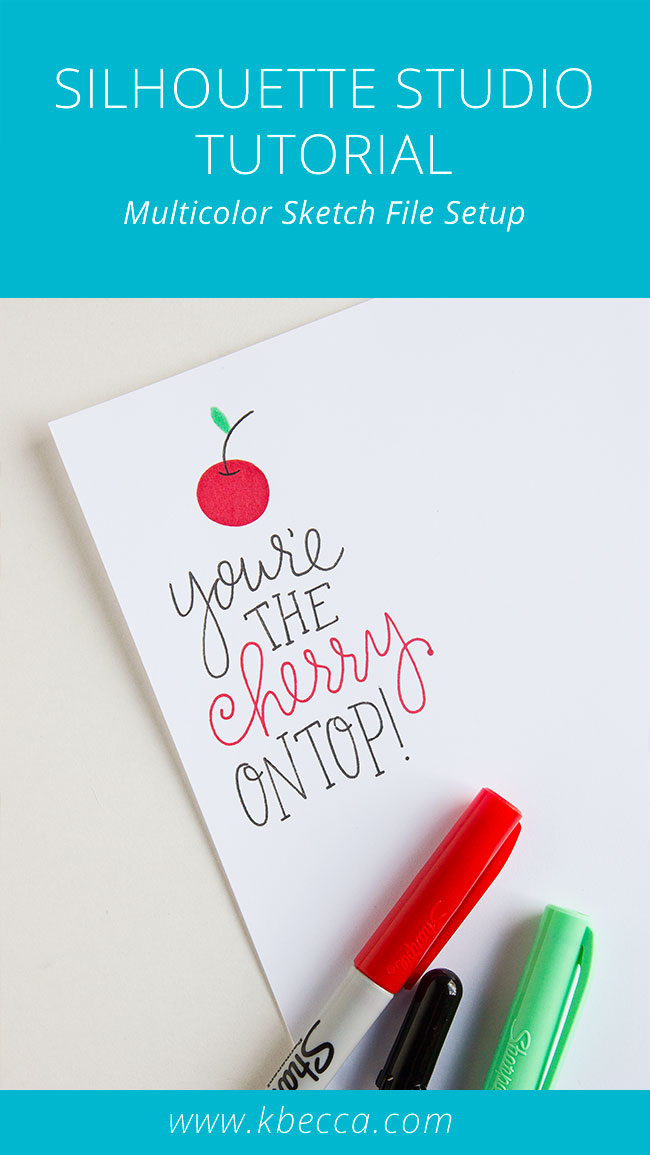
Sometimes, you may want to create a multicolor sketch design instead of a one color design, and Silhouette Studio offers us the option to do just this! In the step-by-step tutorial video below, I’ll show you how to set up a multicolor sketch design in the Silhouette Studio software using the cut by color (or in this case, sketch by color) feature. I’ll also show you how to add a pause between colors so you easily can switch out your coloring tools during the sketching process.
Note : I used a mix of Sharpie Ultra Fine Point Markers and a gel pen for this project because I’ve discovered that these markers do tend to bleed a little bit in areas where they overlap. There’s no color bleed if you use a gel pen in the overlapping areas.
Check out the video below for the step-by-step multicolor sketch file setup tutorial:
Supplies Used in This Project
The following supply list contains affiliate links. I make a small commission if you purchase through these links, and I really appreciate it if you do!
– You’re the Cherry on Top Sketch Phrase
– Silhouette Cameo 3 Electronic Cutting Tool
– Silhouette Studio, Designer Edition
– Nicapa Cutting Mats for the Silhouette Cameo
– Sharpie Precision Permanent Markers, Ultra Fine Point (Set of 24)
– Chomas Creations Silhouette Marker Holder
– Sakura Gelly Roll 08 (Medium Point) Gel Pen, Black
– Bazzill Smoothie Cardstock, Coconut Swirl