I love making stencils with my Silhouette Cameo, and in the video below I’ll show you how easy it is to design layered stencils from a single layer cut file in Silhouette Studio 4.1. It’s just as easy to created a stencil with 10 layers as it is to create one with 2 layers. A registration mark or marks are the key, and they allow you to perfectly line up each layer to create stenciled designs that can be as simple or complex as your heart desires.
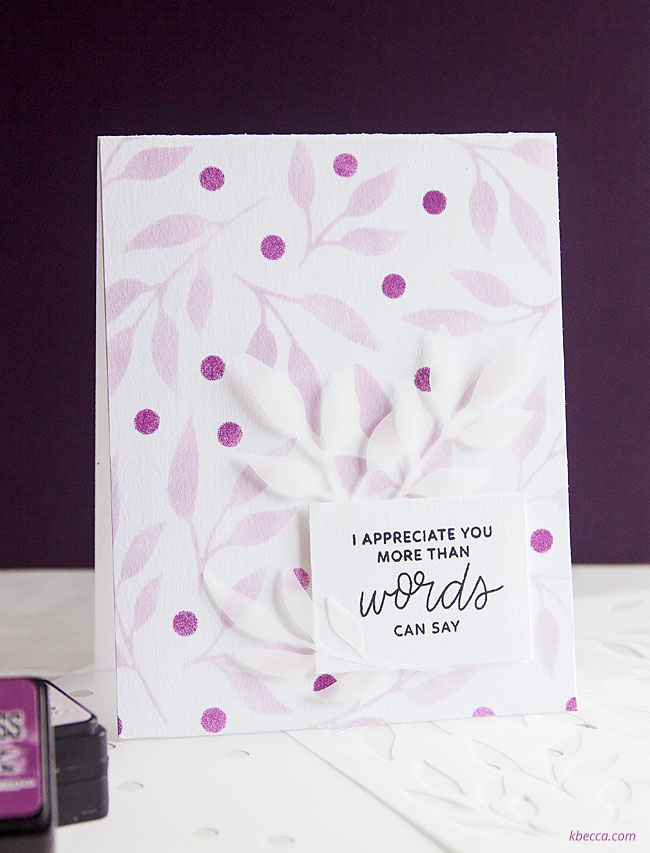
After we create our layered stencil, we’ll use it to make the pretty, stenciled background for the card above. One of the big bonuses of cutting your own stencils is that you sometimes end up with a bunch of super pretty die cuts that you can use as embellishments for projects. I used a few of the leaves from the leaf layer of the stencil to embellish around the sentiment on this card.
Watch the Silhouette Studio tutorial below, and learn how easy it is to make layered stencils for card making and other projects:
Supplies Used in This Project
The following supply list contains affiliate links. I make a small commission if you purchase through these links, and I really appreciate it if you do!
Leaves & Berries Stencil Cut Files
Silhouette Cameo 3 Electronic Cutting Tool
Silhouette Studio, Designer Edition
Grafix Matte Dura-Lar .005
For the Card
Milled Lavender Distress Ink Pad Mini
Seedless Preserves Distress Ink Pad Mini
Ranger Archival Ink, Jet Black
foam daubers (similar to what I used)
Pretty Pink Posh Thoughtful Greetings Stamp Set
Post-it Tape, 1 Inch
Scotch Removable Double Sided Tape
Scotch Foam Mounting Tape, 1/2 Inch
painter’s tape
a non-stick craft mat