In an earlier acrylic pouring for beginners video, we learned the dirty pour flip cup technique, which is a favorite of mine. This week, I’ll be showing you a step-by-step walkthrough for a basic dirty pour. It’s similar to the dirty pour flip cup technique, but it’s different enough that I thought it deserved its own video. I like that the basic dirty pour allows you to have a little bit more control over where your paint goes, though I have to admit that I really like the extra bit of mystery that the flip cup technique offers.
What’s so “dirty” about a dirty pour, you might be asking? Well, you just pour all of the paint colors that you’re using for your painting into one cup before pouring, as opposed to pouring the paint colors onto your canvas separately. I think the “dirty” part just refers to the fact that, instead of pouring a single “clean” color, you’ve got a cup that’s “dirty” with several different colors. But it’s a very simple technique, and there’s no dirt involved!
If you want a more in-depth look at the tools and supplies that I use, as well as how I mix my Elmer’s Glue pouring medium, be sure to check out my first video in this series, Acrylic Pouring for Beginners, Step By Step.
Check out the video below for a step-by-step tutorial on the basic dirty pour technique:
Supplies Used in This Project
The following supply list contains affiliate links. I make a small commission if you purchase through these links, and I really appreciate it if you do!
Husky Plastic Sheeting (or a large garbage bag / old newspapers / a bunch of plastic grocery bags / a painter’s dropcloth)
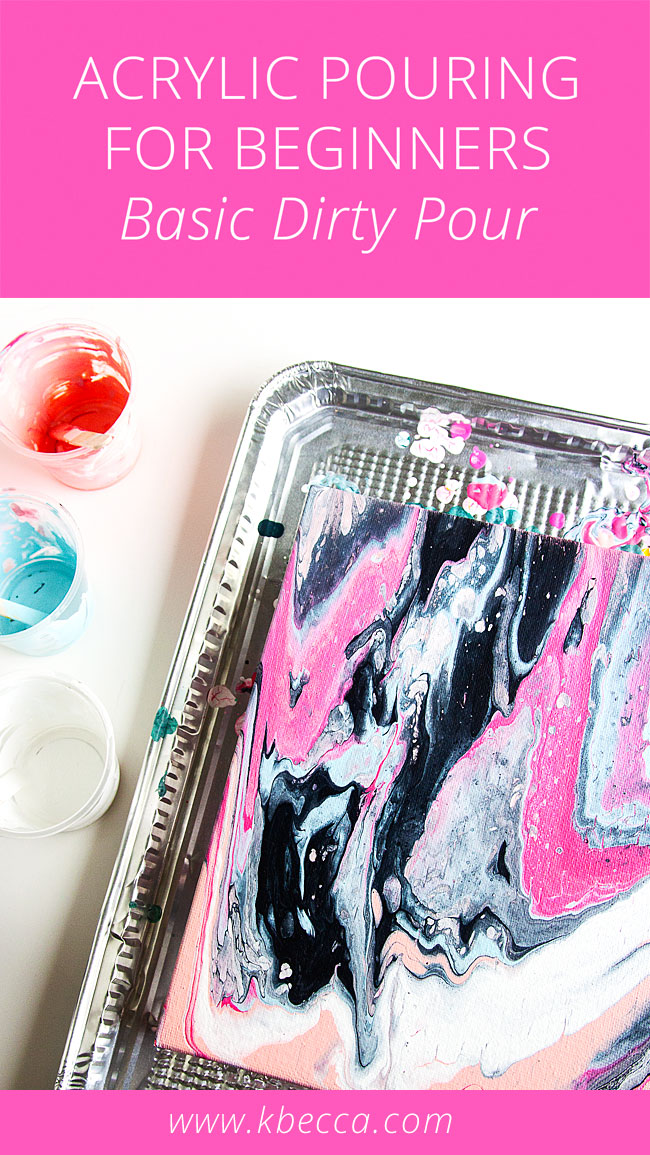
Foil Cookie Tray (to catch most of the excess paint as it runs off the edges of the painting – I purchased a set of 2 for $1.00 at the dollar store)
Vinyl Gloves (if you don’t want to be cleaning acrylic paint from under your fingernails for days, then use gloves – I buy mine by the box at Walmart in the cleaning supplies aisle)
Acrylic Craft Paints (in the video, I used Martha Stewart Wedding Cake, Summer Haze, Pink Dahlia, Americana Deep Midnight Blue & Melon, Folk Art Wicker White, and Ceramcoat Black craft paints)
Pouring Medium (I make mine with a 1:1 ratio of Elmer’s Glue All and water)
Squeeze Bottle (I put the glue and water into this and shake it up until they’re well mixed. The squeeze bottles are a really easy way to dispense your pouring medium, and you can just put the cap back on when you’re not using so it doesn’t dry out)
Food Service Portion Cups (to hold the paint / pouring medium mixture – you can use any small plastic cups for this, or you can save yogurt containers or even plastic cat food containers and use those)
Wood Craft Sticks (to stir the paint / pouring medium mixture – I picked up a package of 100 for $1.00 at the dollar store, and once the paint is completely dry on them, you can reuse them)
Art Alternatives 8×10 Canvas Panels (if you want to hang your paintings on the wall, you should use a regular canvas, but I like these panels and buy them by the dozen from Amazon)
Plastic Shot Glasses (to raise the canvas off of the work surface so the paint can flow off the edges after you pour – I bought a package of 24 plastic shot glasses for $1.00 at the dollar store, but you can use food service containers, plastic yogurt containers, cat food containers, or even a small box under the canvas)
91% Isopropyl Rubbing Alcohol in a spritzer bottle to pop bubbles in the paint. You can spray this into the paint cups before pouring, spritz it onto the canvas after pouring, or both.
Happy pouring!

loved it! still haven’t tried any pouring yet but will do so as soon as I get all the necessary supplies.
I bought Floetral by Flood Based on other videos I’ve watched. Is that considered a medium also?
Great demonstration- ?- thank you!!!!